Made by Ester Fallesen – Class 18
In 3D CGI, textures serve a similar purpose by simulating these physical properties through digital imagery. This involves the application of various visual details to a model, including colors, patterns, and other surface characteristics, using computer-generated graphics. This digital representation allows for intricate control over the appearance of an object, making it a critical step in the visualization and animation process.
The primary goal of 3D texturing is to imbue a digital object with lifelike qualities, transforming it from a flat, featureless form into a vibrant and detailed entity. Through the art of texturing, a model can acquire various surface attributes such as color, reflectiveness, and roughness, closely mimicking or artistically altering the tactile sensations and visual aesthetics of real-world materials. This process is essential for achieving a high degree of realism or for stylistic enhancements that deviate from realistic portrayals, thereby preventing the model from appearing bland or inauthentic.
Mastering 3D texturing is a long-term goal and it can last for years. The exact time of mastering such a skill will depend on your dedication and practice. A standout 3D texture artists excels in mastering other disciplines that 3D texturing builds upon including traditional arts such as photography, painting and lighting. Such an artist demonstrates both technical precision and a strong artistic eye for material accuracy, lighting, and surface detail.
Now, let’s dive deeper into this topic and discover different types of textures and what mapping is, and go through each step from first to last on the 3D texturing process.
What is 3D Texturing?
As mentioned above, 3D texturing is the process of adding textures to a 3D object using computer-generated graphics or traditional media like photos, painting, or video. You can also say that texturing is the process of clothing 3D models.
It is wrapping a 2D image around a 3D object and making it look and feel a certain way. Briefly, 3D texturing is a key element in bringing characters, environments, and objects to life, however, you can also texture dead and inanimate objects. The goal of a texture artist is to match the model's surface to the concept art design or real-world counterpart.
Those textures can be of different colors, surfaces, and details. From smooth to rough surfaces, from single-colored to multi-colored models. This whole process represents applying detailed surface characteristics to 3D models or visual effects elements to look as realistic as possible to a real-life object or a model.
For example, you want to create a model of your favorite action figure. Your job is to make sure that your 3D object has the same color and surface properties as a real-world action hero has when rendered.
On the other hand, if you want to create, for instance, a fruit bowl, your object will have a polished metal surface with a glossy metallic appearance, just like it would be in real life.
To create such surface characteristics and appearance of an object you will need to use a computer-generated graphic. Thus, you will need to have a higher knowledge of computer techniques. Such tools depend on the 3d texturing software you are using and thus your 3D object's final look.
However, you can also add more texture to a model by hand-painting it or by using real photographs to create a detailed and realistic appearance. This means that 3D texturing is the method of creating or applying textures.
The texturing stage of the 3D animation pipeline includes unwrapping, texture painting, shading, and rendering. At the end, or at the rendering stage we use textured models where it applies texture to give characters in 3D modeling their finer details.In
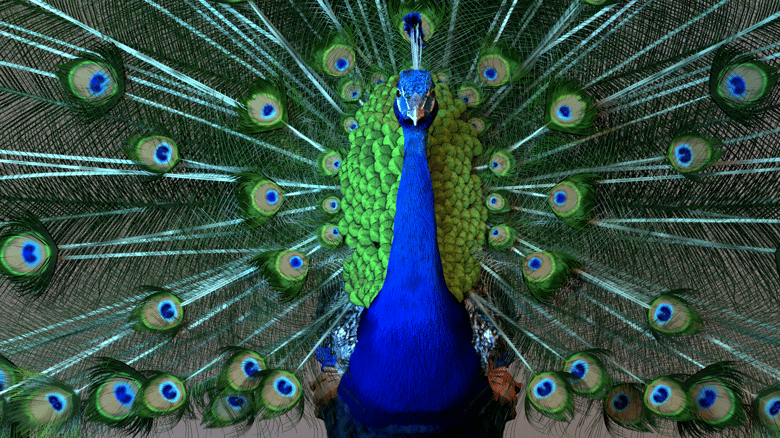
In a three-dimensional setting, the texture gives the viewer a sense of essence to an object. Just looking at these objects, viewers should be able to tell what they're made of. It creates stylized or natural textures and materials.
Types of Textures and Texture Mapping
Texture mapping is a method of applying a detailed surface appearance to 3D objects. Texture represents a high-frequency detail, surface texture with different details or colors. Mapping, on the other hand, represents a 2D image (texture) applied onto the surface of a 3D object.
In 3D texturing in video games and animation, there are different kinds of textures.
Bump maps: This kind of mapping technique is made to fake bumps and wrinkles on the model’s surface.Displacement maps: Displacement maps are very similar to bump maps. They are also called height maps and are responsible for creating shades and silhouettes by storing height information and modifying geometry.
Color maps: Color maps are the most common type of texture mapping. This is part of 3d texturing techniques where you use colors, shading, and patterns in the model.

Made by Victor Skarbye (CADA Alumni)
The 3D Texturing Process: Step by Step
MODEL Preparation
The process begins with either importing a pre-existing 3D model or creating one from scratch in your chosen software. It’s crucial to ensure that the model is well-prepared with correct UV coordinates and clean geometry to avoid any texturing issues later.
Texture Mapping
This step involves unfolding the 3D mesh using UV mapping, which translates the 3D surface of the model into a 2D projection. This technique allows for the seamless application of 2D images (textures) over the 3D object, linking these textures directly to the vertices of the mesh. The UV map created here serves as the blueprint for subsequent texturing and shading processes.
Texture Creation & Application
Now, the creative part of texture creation begins. You will choose from various texture maps such as normal maps, color maps, and specular maps, among others, to define the intricate details of your model. Each map serves a specific purpose, enhancing different aspects of the model's surface. After selecting the appropriate textures, they are applied to the model, taking into account factors like reflectivity and color to achieve the desired visual effect.
Texture Refinement
Refinement focuses on the fine-tuning of texture details such as line precision, bump strength, shininess, and color density. This stage is essential for adding depth and realism to the model by adjusting texture specifics like roughness and glossiness.
Lighting and Rendering
With texturing complete, the next phase is to set up appropriate lighting within the software to highlight the texture’s response to light and shadows accurately. Rendering integrates the texture maps with the model’s shader, which dictates how the texture interacts with light and shadow based on the physical properties assigned during texturing. Choose texture maps and shaders that best suit your rendering engine to optimize the visual output.
Testing
The final step involves rigorous testing of the 3D model under various lighting conditions and environments. This phase is crucial for identifying any needed visual adjustments, ensuring the model's realism and adherence to design specifications.
Texture Painting and Procedural Texturing
A procedural texture is constructed using a mathematical description, such as an algorithm, rather than directly collected data. The benefits of this approach are cheap storage costs, limitless texture resolution, and simple texture mapping. These textures are often used to create surface or volumetric representations of natural elements including wood, marble, stone, metal, granite, and others.
Physically Based Rendering (PBR) in Texturing
Physically Based Rendering (PBR) encompasses a suite of techniques known collectively as Physically Based Shading (PBS), which aims to simulate the interaction of light with surfaces in a way that mirrors real-world physics. PBR is crucial for achieving realistic visual results in digital content by modeling how light reflects, absorbs, or scatters across different materials.
In the realm of 3D graphics, "texturing" refers to the application of image maps (like color, normal, or displacement maps) that provide visual details to a model, whereas "shading" involves calculating how those textures interact with light based on material properties defined in the shader. A shader is a set of mathematical instructions used by the rendering software to depict the surface characteristics of an object under various lighting conditions.
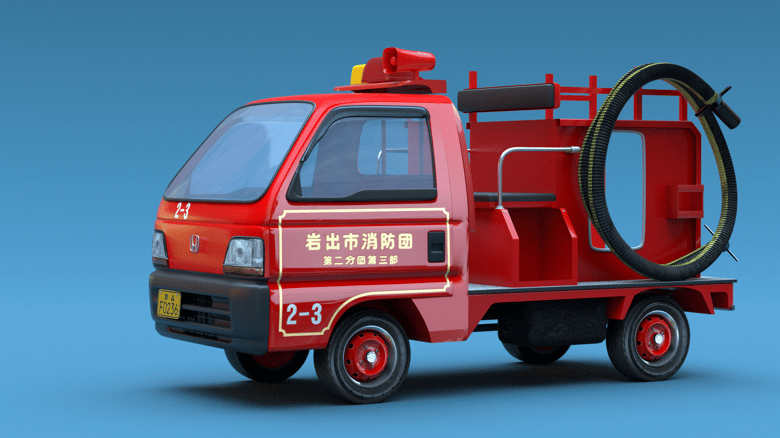
For instance, in PBR, a metal texture is not merely about its visual appearance but also its physical properties, such as smoothness, roughness, and reflectivity. These properties determine how light interacts with the surface, ensuring that the metal appears realistic under different lighting scenarios by reflecting light similar to its real-world counterpart.
This fidelity to real-world behaviors, such as how a rough metal surface might diffuse light more than a polished one, is what makes PBR particularly effective for materials that need to behave consistently across diverse lighting conditions, ensuring that digital representations closely match their real-world inspirations.
Made by Gabriel Bachmann (CADA Alumni)
3D Texturing in Video Games and Animation
While the fundamentals of 3D texturing apply broadly across animation, visual effects (VFX), and video games, it is within the gaming industry that these techniques are uniquely adapted due to platform-specific constraints.
Real-time (RT) engines that power video games operate under strict limitations in terms of computational power and data storage capacity. These restrictions significantly influence the texturing workflow, necessitating optimizations that balance visual fidelity with performance.
Similarly, Extended Reality (XR) experiences, which include virtual and augmented reality, face even more stringent constraints, affecting how textures are designed and implemented. Conversely, in VFX and animated films, the priority is to achieve a precise visual style as dictated by the art department, often allowing for higher levels of detail and less concern for computational efficiency.
In general 3D texturing, the focus is on creating detailed and realistic surface textures for any type of 3D model, without necessarily considering performance limitations. This can include anything from product design to architectural visualization, where textures are typically high-resolution and designed to meet visual and functional needs.
In video games, however, the textures must be optimized for real-time rendering. This means textures are often compressed, limited in size, and rely on techniques like normal mapping and texture atlases to maximize detail without overloading the system's performance. Game textures need to balance visual quality with efficiency, ensuring smooth gameplay.
Learn 3D texturing at CADA
Though this might sound challenging to you at first, everything is learnable. All 3D texturing in video games and animation can be learned at the Academy of Digital Arts Cada. The whole education consists of 7 semesters, while texturing is learned in the first semester.
The semester will cover all the fundamental knowledge you need to gain including texturing, modeling, lighting, simple rendering, and other things. You will learn how to deal with challenges and gain problem-solving skills with a reflective approach. With Cada you can become 3d digital artist with ease!